

Welcome to part two of my Getting Things Done series. In part one I went through the fundamentals of GTD. You can read that article here Getting Things Done Part 1 or watch my video. This article will show you how to apply the GTD principles to your Outlook inbox.
If you are using the traditional Windows Outlook client then you can use the video links in this article to configure outlook. For everyone else that is using Outlook Web Access (OWA) from a browser or have dared to use the “New Outlook”* client I have created some new instructions to cover this.
*“New Outlook” Essentially turns your Outlook client into Outlook Web Access (OWA). This can be beneficial by creating a uniformed experience across both apps.
The goal here is to create a way of sorting through your inbox and being able to easily filter actionable items. To do this you will first have to set some global settings to Outlook.
Global Settings
You can access all setting by clicking on the cog icon on the top-right of the page.
When you have opened the setting you can easily find each section I have listed below by using the search panel.
Mark as Read
Setting your emails to “Don’t Automatically mark items as read” will help you identify new emails and actionable items at a glance.

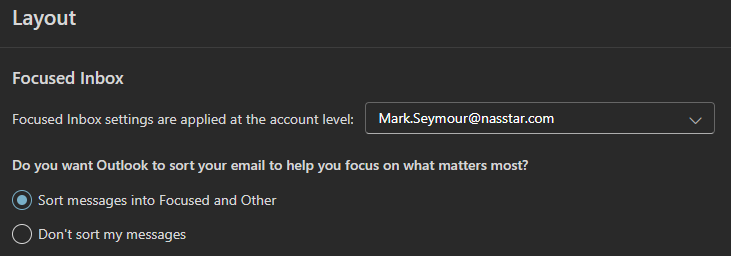
Focused Inbox
Outlook is pretty good at sorting out the wheat from the chaff when it comes to actionable emails. Enabling “Sort messages by focused and other” will speed up how you process your mail.
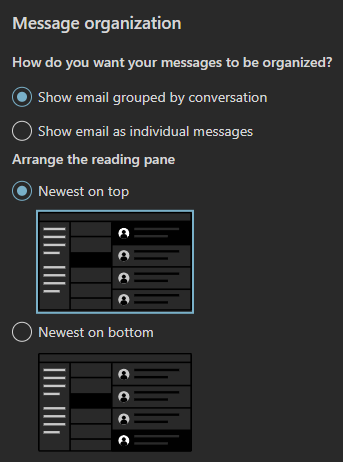
Message organisation
We will be sorting our inbox by oldest mails first, therefore grouping by conversation will help keep the flow of the conversation going.
Categories
The way we will tag if an email is actionable, is by adding categories for each actionable state. This is performed in the Categorize section
Click on Categorise and Manage categories
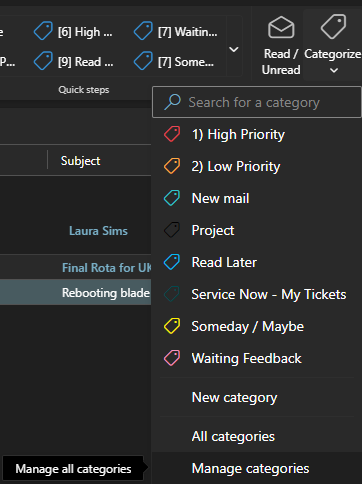
From here you can create new categories.
Here I have created a category for “High Priority”, selected the star to add to favourites and chosen a colour
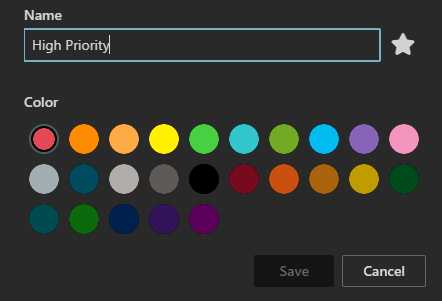
Do this for the following categories and make sure each has a different colour.
- High Priority
- Low Priority
- Read Later
- Waiting Feedback
- Someday / Maybe
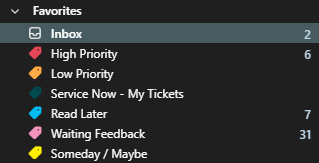
Once done, you will see these categories listed on your left panel under favourites. Organise them as you see fit by dragging each category. Mine are listed like this.
Organising our Inbox
Now we have finished with general Outlook settings and creating categories, we can look at how emails will be organised.
| Folder | Categories | Description |
|---|---|---|
| Inbox | n/a | New emails only |
| Actionable | High PriorityLow PriorityWaiting Feedback | All emails that need to be actioned will sit in this folder |
| Read Later | Read Later | All emails that you don’t have time to digest straight-away will be put here |
| Someday / Maybe | Someday / Maybe | This is where emails you have decided not to action will go. This should be reviewed periodically and upon review mails should either be archived or set with an actionable category. |
| Archive | Done | This default folder will hold all emails with no actions in addition to all completed actions. |
| Deleted Items | n/a | Where unwanted emails go to die. |
Quick Steps
To help us organise our emails as stated above we will create six quick steps to automate the process or tagging and moving.
Go to settings > mail > quick steps.
Create the following quick steps
| Name | Actions | Options |
|---|---|---|
| [5] Done | 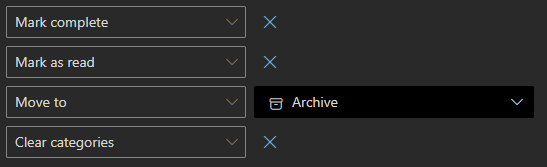 | Ctrl+Shift+5 |
| [6] High Priority | 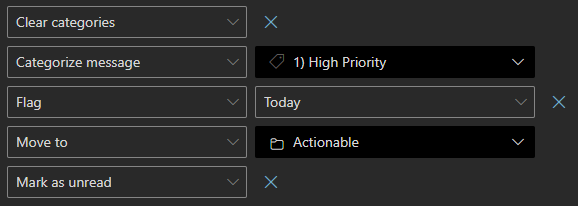 | Ctrl+Shift+6 |
| [7] Waiting Feedback | 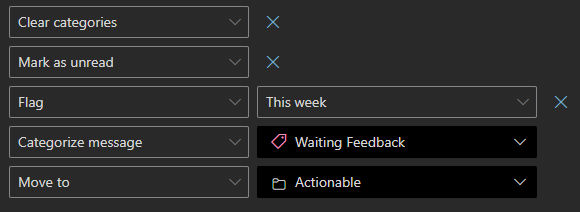 | Ctrl+Shift+7 |
| [8] Low Priority | 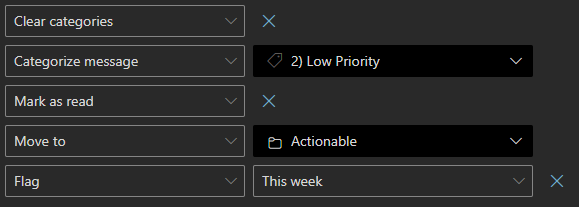 | Ctrl+Shift+8 |
| [9] Read Later | 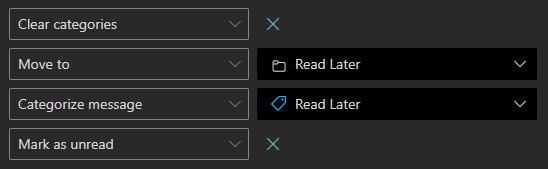 | Ctrl+Shift+9 |
| Someday / Maybe | 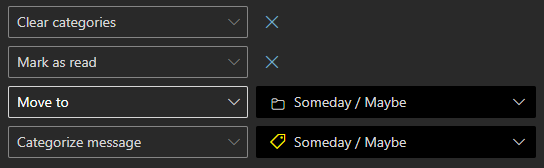 | N/A |
Once complete, your ribbon bar should have a Quick steps section that looks like this.

Note: If you don’t see this then you may need to switch between classic and simplified ribbon.
You may also notice that each quick step is prefixed with its corresponding Ctrl + Shift + [number]. This is a personal preference to help me remember the shortcuts..
First Run
You are now in a position to start going through your inbox items and tagging or archiving them accordingly.
If your inbox is littered with read and unread items then sort by date descending for your first run. Categorise actionable emails as far back as you can, until you feel confident you have captured all your actions. All older emails can now be archive allowing your inbox to become empty.
Clearing your inbox allows you to move forward with no clutter and all your archived emails will still be searchable if needed.
You will soon have an empty inbox and a clear view of actionable items by using the “unread count” on the left of the favorites.
At the end of your first run do remember to change your inbox back to sort mails by ascending received date so all emails are processed in a First In First Out order.
Remember the rules
Now you have set Outlook to organise your emails, you can combine it with the GTD rules for ultimate productivity.
Summary
I hope you have found this blog helpful. Please ask questions or leave comments and I will make amendments. I am planning to make a video to cover this process in the future, so watch out for that soon.
Leave a Reply